
The transmitter is one of the most important parts of a radio. It is an electronic device that generates radio waves. In turn, with the help of an antenna, the transmitter can send data.
You can buy a transmitter if you wish. It’s convenient and easy, especially considering you can find many at low prices without compromising quality.
For some people, however, they would rather make one themselves. If that’s the case, then you should know how to make a radio transmitter, which is what we’ll be talking about below.
Table of Contents
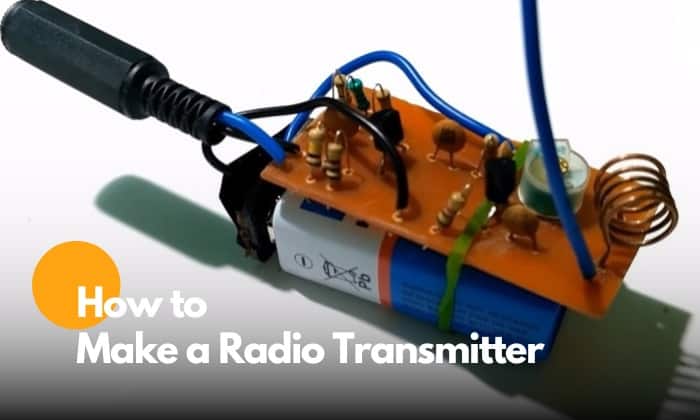
A Step-by-step Guide to Make a Radio Transmitter

You may be interested in learning how to make a simple radio transmitter and receiver, but you’re worried that it will be difficult. Yes, you have a point!
A DIY FM transmitter can be tricky to build, especially if you have no experience. Nonetheless, with the right tools, things can be a lot easier.
In this section, we’ll teach you how to make an FM transmitter in the simplest possible way. We’ll be making one that’s basic but functional.
What You Will Need
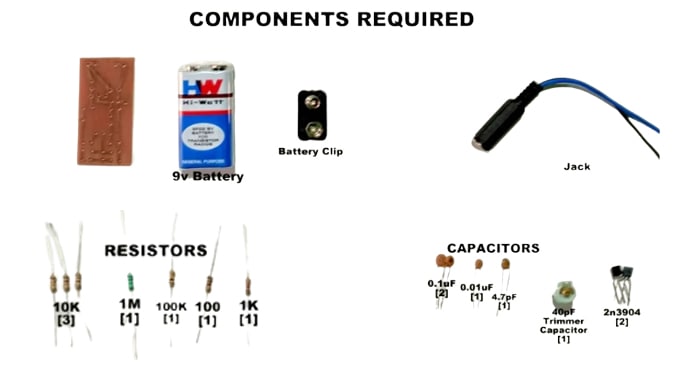
- PCB
- #18 solid-gauge wire
- ¼ bolt
- Electret microphone
- Two transistors
- Capacitors
- Resistors
- Pliers
- Hot glue gun
- Soldering iron
- Mini drill
- Paper
- Cutter
- Printer
- Fluorescent lamp
- Timer
- Sodium hydroxide
- Ferric chloride
- Acetone
- Cotton swab
- 9-volt battery
Are you ready to build a radio transmitter? Below are the steps you must follow.
Step 1: Gather the Materials
The first thing to do is to prepare the materials you’ll need. Make sure everything is ready before you start. You can buy these materials online.
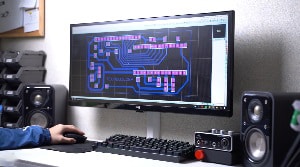
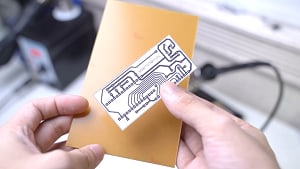
Step 2: Download and Print the PCB Pattern
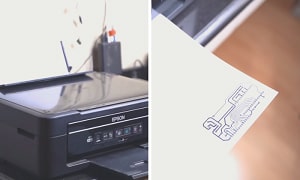
You don’t need to make the PCB pattern for the radio frequency transmitter yourself. Instead, you can download one online. For the purpose of this guide, the pattern that we’ll be using is the one in the photo above.
After downloading, it’s time to print the pattern. Make sure that the size follows the size of the board you’ll be using later. Once it’s printed, cut according to the shape and size.
Step 3: Create the PCB
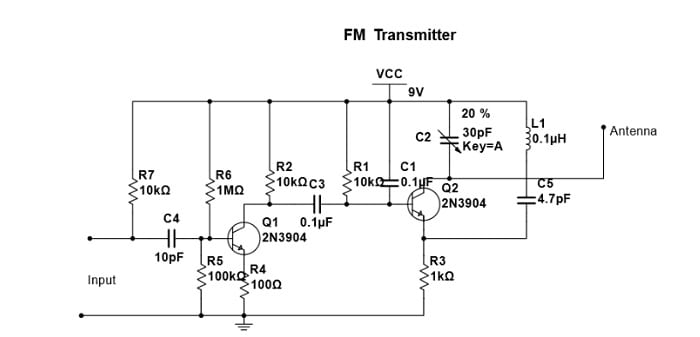
Now comes one of the most important steps in building an FM transmitter for home. There are different ways to do this, but we’re opting for the use of photopositive PCB.
Also known as pre-sensitized or photo-resist PCB, we’re using a copper-clad board with a film layer on the top. This will be the foundation for the FM transmitters circuits.
Remove the film on the top of the PCB. Next, attach the PCB pattern you have earlier printed. Put the PCB under a fluorescent lamp and wait until after 5 minutes and 20 seconds.
It’s important to keep a timer handy. Going beyond the recommended time can result in over-exposure.
Now, put the PCB in a small bowl filled with sodium hydroxide. After a while, the lines will start becoming visible.
Remove sodium hydroxide from the container. Once empty and with the PCB still on the container, add ferric chloride and wait half an hour. The latter is a corrosive chemical that etches copper.
The last step for preparing the PCB is to remove the board from ferric chloride and add acetone. Use a cotton swab to clean the surface.
Step 4: Drill the PCB
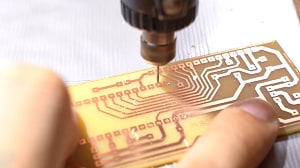
At this point, the patterns must be visible in the PCB. Use a mini drill and drill holes on the board. Make sure to follow the pattern religiously.
Step 5: Start Soldering
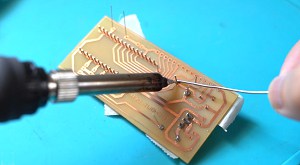
With the holes now apparent on the board, begin soldering. Start with the resistors, then proceed to the capacitor.
After which, you should solder the electret microphone. Note the polarity, which must be followed so that the transmitter will work.
Step 6: Make the Coil and Connect to an Antenna
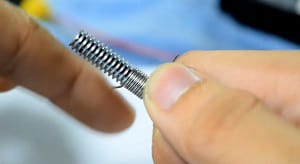
The board is now almost ready. Proceed to make the coil. Wind the wire across a bolt up to eight times.
Next, solder it to your antenna. In this case, the antenna that we’ll be using is a hook-up wire. Keep the length no more than eight inches.
Step 7: Prepare a Battery Clip
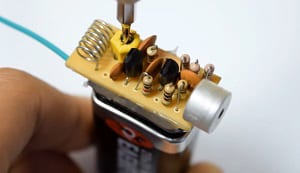
You don’t need to make one from scratch. Instead, you can use one from an old 9-volt battery. Remove the clip from the battery, add wires, and connect it to your battery.
Use a hot glue to attach the transmitter and the clip.
Step 8: Tune Your Transmitter
You’re almost done at this point, but make sure that you do not skip tuning. Attach it to a battery. Use a screwdriver to adjust the trimmer capacitor until there is a clear reception.
How Does a Radio Transmitter Work?
Now that we talked about the basics of building an FM transmitter, let’s briefly discuss how it works.
The transmitter is one of the most important components in a radio. It is the one that takes, encodes, and transmits the message.
After the message passes through the transmitter, it is the receiver that decodes it. It’s also good if you can learn how to make a radio receiver, but that would be for another post.
What Three Components Make Up a Transmitter?
The three components you will find in a transmitter are the power source, circuit board, and antenna. They will work together to make the transmitter function as it should.
Conclusion
At this point, we hope that you learned a thing or two about how to make a radio transmitter at home. It can be intimidating at first, but it’s actually easy.
You can make a small FM transmitter from household items, but you’ll need to buy the electronics, including the capacitors and resistors.
It should be noted, however, that we made one that’s simple. If you want to make a long-range FM transmitter, the steps above are not applicable.

Hi, I am Amaro Frank – the Wind Up Radio’s content editor and writer. Working with Adam is so much fun, as his stories and experiences enrich my knowledge about radio communications and radio accessories. My main tasks in Wind Up Radio are building content and generating great articles on different topics around radio accessories.