
It is essential to receive daily weather alerts, especially for people living in severe weather areas. Most modern smartphones can provide you with that information; you just need to download a trusted app and install it properly. The local TV station is an excellent source of information as well.
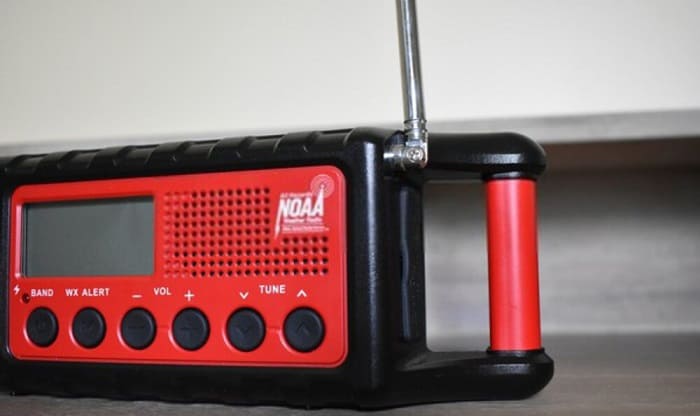
Today, we will show you another helpful way to receive weather warnings, which uses a weather radio. So let’s explore how to program a Midland NOAA weather radio.
Table of Contents
11 Detailed Steps to Program a Noaa Weather Radio
After purchasing a new NOAA weather radio, it is essential to set up your radio correctly to get the necessary weather notifications. This method could be used to re-set NOAA weather radio runs into issues, too.
Before you do anything, we recommend carefully reading the Midland NOAA weather radio manual to avoid missing any critical information.
Step 1: Put Batteries And Plug Your Radio Into an Electrical Outlet
Start by inserting AA batteries into your NOAA weather radio. Keeping new batteries in your radio is essential to ensure it works even during a power outage. Therefore, we recommend that you replace them once a year.
Step 2: Turn On the Switch
Next, turn on the switch of your radio. Keep in mind that it is not the power switch. Turning that switch on allows your radio to receive weather information. If this switch is not turned on, your device will never operate.
Step 3: Set Alert Type
First, press the “Select” button to set the alert type. There are three available options: “Tone,” “Voice,” and “Display.”
It’s wise to choose the “Voice” option. As a result, your radio will read the alarm aloud so that you can hear all the necessary information while it still shows the alert on its screen.
Step 4: Set Location
There are two ways to set location:
- New radios
A menu will be displayed with three options available: Multiple, Any, and Single.
It’s best to choose the “Single” option and select only your county. In fact, many people want to receive notifications from neighboring counties. As a result, they sometimes receive warnings about storms that do not affect their area.
For example, if you need to select an area in the US, the device will provide you with a list that includes all territories and states. Next, use the up & down arrows to find the county and press “Select.”
For the “Multiple” option, it’s possible to select up to twenty-five counties.
- Older radios
In general, older radios have many similarities with new radios. Newer radios are designed to be easier to use. Therefore, it’s possible to program your older radio by following the same process; however, you’ll need to use the “Same” code.
To find the “Same” code, check out here. First, find your state and scroll through the list to select the county, then select the “Same” code in your county.
Next, choose the “Multiple” or “Single” option. Then press the up & down arrows and the left & right arrows to enter your “Same” code. Finally, press “Select” to end your process.
Step 5: Set Your Language
Open the “Language” option if you want to select the language.
Step 6: Set The Alarm Clock
Your Midland NOAA weather radio has an alarm function. First, press the “Menu” and the up arrow button until the “Alarm” option appears; Then press “Select.” Next, use the up arrow and the right arrow to change the hours and minutes; Then press “Select.”
In general, you should not choose this option if you do not plan to use your radio as your daily alarm clock.
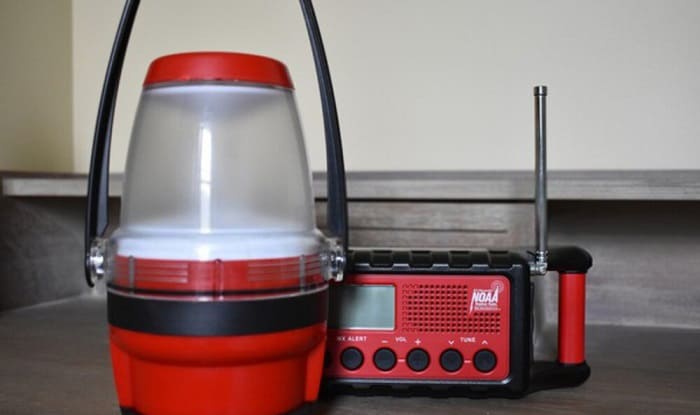
Read more: The top-rated dual alarm clock radio with battery backup.
Step 7: Set Time
To set time, press the up arrow until “Time” is displayed. Then, press the up & right arrow buttons the same way you set the alarm.
Step 8: Set Events
With this option, you can choose the type of alerts; Available options include “All off,” “All on,” “Edit events,” and “All default.”
It is best to set your radio to “All default.” If you do not want to receive unnecessary warnings, select “Edit events.” and press “Select.” Then, you’ll be navigated to a list that includes all possible alerts your radio may send you. Here you can use the up & down arrows to turn unwanted alerts on (or off).
After completing the installation, return to the main menu by selecting “Menu.”
Step 9: Button Beeps
This option allows you to turn on (or off) the sound your radio makes when you press a button.
Press the up & down arrows to turn on (or off) the sound. After that, press “Select” to save your selection.
Step 10: Set Channel
To find the channel you want, click National Weather Service website. Next, choose your state and find the area closest to you. After that, record the frequency of the channel you need on a piece of paper.
Return to the NOAA weather radio; Press the up arrow until the “Channel” option is displayed, then press “Select.” Next, press the up & down arrows to cycle through the different channels until you find a set of six digits that matches the frequency you just recorded on paper.
After selecting a channel, if the sound you receive is not clear, try raising the radio’s antenna or changing its position. It is a good idea to keep moving until you get a better sound. Finally, press “Select” to finish your work.
Step 11: Alert Test
Last but not least, after programming Midland NOAA weather radio, you need to do an alert test. By tapping “Check Alerts,” you’ll hear its sound when something happens.
Refer to this video for more Midland NOAA radio setup.
Frequently Asked Questions
Is a weather radio necessary?
Yes. The weather radio is necessary for people who live in extreme weather areas. Specifically, it can keep you safe by providing information on the specific threat.
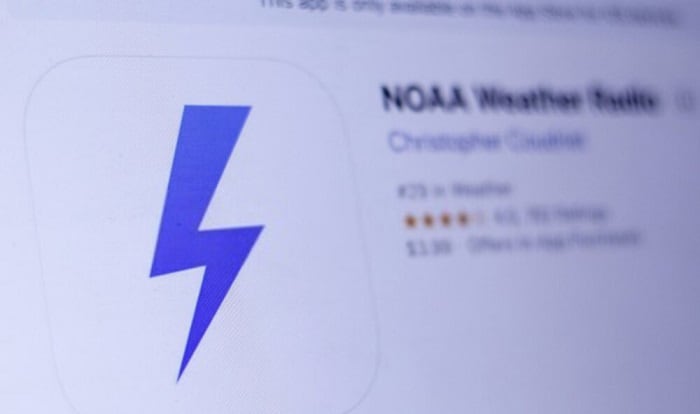
Can I get a NOAA radio on my iPhone?
The NOAA Weather Radio app is available for your iPod touch, iPad, and iPhone. It gives you over 200 NOAA Weather Radio All Hazards Broadcasts.
Why is my NOAA weather radio not working?
The most likely cause is that you programmed your radio incorrectly, or the programming has been changed or lost.
What is the best NOAA Weather Radio?
The Midland WR400 is the best NOAA weather radio available.
What is the difference between a weather radio and a regular radio?
A weather radio automatically responds when it receives an emergency alert, even if you are not listening to it. A regular radio does not warn you when an alert is issued unless the power is on and tuned to a local weather station.
Conclusion
In general, the NOAA weather radio can keep you safe in inclement weather. They are widely available at affordable prices.
Hopefully, by the end of this article, you have a better idea about Midland NOAA weather radio troubleshooting, especially how to program a Midland NOAA weather radio. Please share our tips if you find them helpful, and don’t forget to revisit us for more radio recommendations and advice.

Hi, I am Amaro Frank – the Wind Up Radio’s content editor and writer. Working with Adam is so much fun, as his stories and experiences enrich my knowledge about radio communications and radio accessories. My main tasks in Wind Up Radio are building content and generating great articles on different topics around radio accessories.