Whether it is listening to your favorite music or catching up on a well-loved sport, the radio in your golf cart can be beneficial in more ways than one.
You don’t have to miss anything. Learn how to install a radio in an EZGO golf cart and you will stay updated, even when you are on a golf course.
Read on and learn from the tips I’ll share on EZGO golf cart radio installation. You don’t have to pay a pro to complete the task for you as it can be a quick DIY task.
Table of Contents
- A Quick Step-by-Step Guide to Install a Radio in an EZGO Golf Cart
- What to Prepare
- Step 1: Start by choosing the right radio to install in a club car golf cart.
- Step 2: Mind the specs of the club car.
- Step 3: Choose the appropriate location of the radio for EZGO golf cart.
- Step 4: Mount the radio using the included mounting bracket.
- Step 5: Assemble the speakers.
- Step 6: Connect the stereo system.
- Step 7: Test the EZGO golf cart stereo to make sure everything is working.
- Frequently Asked Questions
- Conclusion
A Quick Step-by-Step Guide to Install a Radio in an EZGO Golf Cart
Transform your tee time into tune time! Below are the materials that you will need for this task, followed by the detailed steps.
What to Prepare
- Radio
- Speaker
- Converter or deep cycle battery
- Saw
- Mounting bracket
- Drill and drill bits
- Wire
Step 1: Start by choosing the right radio to install in a club car golf cart.
Because of exposure to elements like water and heat, I recommend something that can withstand harsh environments. Marine radios are great since they are meant to be tough.
Step 2: Mind the specs of the club car.
For instance, in a 48 volt golf cart, you might first need a converter to fit a 12-volt radio. This will ensure drawing enough power to sustain the radio’s requirements. As an alternative, you can also add an extra deep-cycle marine battery.
Step 3: Choose the appropriate location of the radio for EZGO golf cart.
In most cases, it’s a matter of personal preference. I like putting it in the glove compartment. Here, it has enough protection from the rain.
If you opt to place it in the glove compartment, use a small saw to create a hole in the glove box’s door. It should be large enough for the radio to fit in.
Step 4: Mount the radio using the included mounting bracket.
Most models will include a radio mount upon purchase. Otherwise, you can go online and find a bracket suitable for your radio.
Step 5: Assemble the speakers.
I suggest putting it under the canopy or the compartment below the seat. Drill holes depending on where you will install them.
Step 6: Connect the stereo system.
Run the power cable from the battery to the radio. Connect the radio as well to the speaker using the provided wire.
Step 7: Test the EZGO golf cart stereo to make sure everything is working.
Make sure the wires are secure in their right places. Then, turn your radio on and see if it works normally.
Frequently Asked Questions
What Does TXT Mean on EZGO Golf Cart?
TXT means Textron. The latter refers to the name of the company that manufactures the EZGO golf cart. It is a multi-industry business with partnerships with other reputable brands as well.
A TXT EZGO cart can have a different design than others. Hence, you might need a TXT radio dash kit specifically designed for it.
How Do I Connect My Bluetooth to My EZ Go Golf Cart?
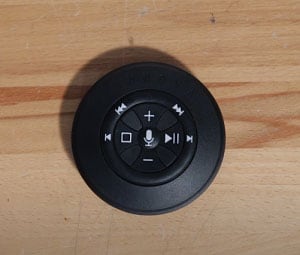
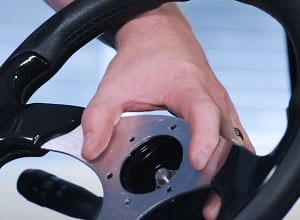
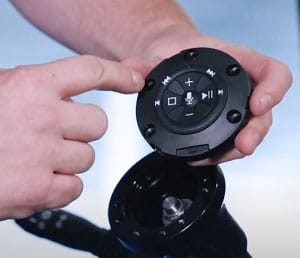
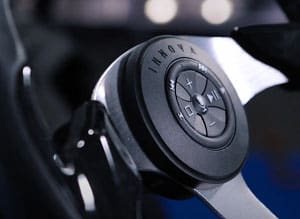
You’ll need a Bluetooth remote, which you can install on the steering wheel hub. The specific installation instructions will vary from model to model.
It could also come as a built-in feature in some radios. Follow the instructions from the radio manufacturer. Some will have a Bluetooth button that you need to click to pair.
Do I need a converter to wire a radio in an EZGO golf cart?
Yes, you need a converter. This is necessary to hook up a 12 volt radio to a 36 volt golf cart. The same thing is true if it is 48 volts. This will ensure that there is no mismatch.
Conclusion
After reading this guide, I hope that you are now familiar with how to install a radio in an EZGO golf cart. It can be as easy as creating an opening in the dash, putting the radio in, and wiring.
Nonetheless, consider various golf cart radio ideas when it comes to where to install the radio. The glovebox is a good place. Also, look for the right place to connect the speakers.
To make it even better, consider having a Bluetooth hooked up golf cart. You can buy a Bluetooth remote. Otherwise, some radios will have built-in Bluetooth features.
Read more: Costs to install a car radio.

Hi, I am Amaro Frank – the Wind Up Radio’s content editor and writer. Working with Adam is so much fun, as his stories and experiences enrich my knowledge about radio communications and radio accessories. My main tasks in Wind Up Radio are building content and generating great articles on different topics around radio accessories.


