

A ham radio, also known as amateur radio, is a popular appliance for communications. It transmits messages at a distance and appeals to a wide range of users with unique needs.
Some people, like sailors and hikers, carry a ham radio for emergencies and SOS requests. Others own a ham radio to experiment and learn about radio techniques.
However, not everyone can afford a ham radio. As a result, DIY ham radios make an entrance.
It is possible to make ham radio on your own. Yes, you read that right! Learning how to build a ham radio from scratch is not rocket science, though it will take time and effort. Aside from that, you can have fun and learn a lot during the building process.
To build a ham radio by yourself, it is important to know the necessary materials and the assembly steps, both of which we will uncover in this article. So, what are you waiting for? Continue reading to grasp the final answer.
Table of Contents
Building a Ham Radio From Scratch (3 Steps In Detail)
Building your ham radio does not have to be complicated. You just need to read the following sections carefully and follow them word-by-word. Then, you will have a DIY ham radio in no time.
Preparation
Have the following ready to build your own ham radio:
1. A ham radio building or circuit board kit
2. A set of hand tools (If not included in the kit)
-
- A screwdriver
- A soldering iron
- A pair of pliers
- A wire cutter
- A wire stripper
3. A spacious workplace with good lighting
4. A magnifying glass (Optional): Once you have the materials listed above, you are ready to proceed to the steps in the following section.
Step-by-step Instructions

Step 1: Be aware of the different parts of a ham radio
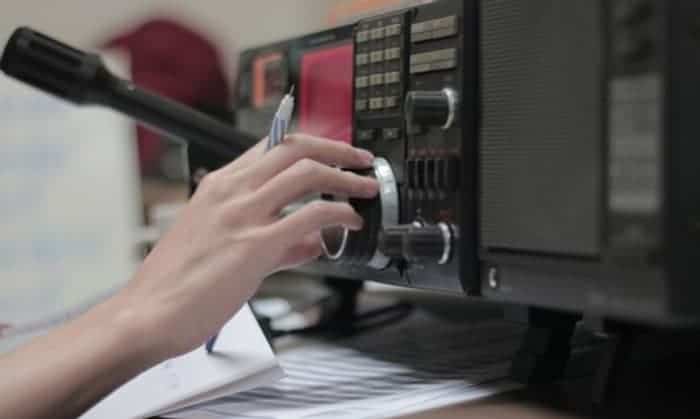
A complete ham radio is a system of components working together. In detail, the transmitter, the receiver, the antenna, and the antenna tuner make up the main bulk of a ham radio.
- The Transmitter & Receiver
These two components go hand-in-hand and are often called a transceiver. You can get them separately or together on a single gadget. The latter option is less convenient and cost-effective, but you can study the components more closely.
This part of the ham radio sends and accepts signals, which are later translated into audible messages or data.
- The Antenna
This component usually comes as a metal rod or dish. It catches radio waves and converts them into electrical signals, which then feeds into the radio system. You can easily find antennas in the niche market for radio accessories.
They are relatively affordable, so you do not have to worry about draining your wallet for them. Still, it is crucial that you get a quality antenna. When choosing, consider the materials of the construction and the reputation of the manufacturer!
There are two types that you can choose from: an omnidirectional and directional antenna. Generally, ham radio operators prefer omnidirectional antennas, but keep in mind that they are a bit more costly than directional antennas.
- The Antenna Tuner
This component is positioned in between the antenna and transmitter. It is responsible for strengthening the transfer of power, which, in turn, optimizes the ham radio’s performance and efficiency.
It does this on the transmission line by correlating the impedance of the radio unit with that of the antenna. Without an antenna tuner, not only will power be partial, but the power can reflect back to the feeder and bump voltage, thereby inflicting damage to the transmitter.
Step 2: Obtain the right license to be a legal ham radio operator
This refers to the license that you must achieve to use your ham radio. There are three types that you can get:
- Entry-Level
Also known as the technician license. With this type of permit, you can only use several HF bands. Plus, you cannot partake in long-distance communications.
You need to complete a 35-question exam on radio theory to demonstrate competency. Then, you can enjoy access to frequencies above 30 megahertz. This entails that you can communicate locally within North America.
- Intermediate-Level
This also goes by the name general class. You can get this license if you pass the 35-question exam and another Technician written exam. Then, you get access to a wider range of HF bands. The intermediate level is where most ham radio enthusiasts settle.
- Advanced-Level
This is the highest level that you can seek. However, it is not easy to obtain. First, you will need to pass a 50-question licensing exam. Then, you will become an amateur radio operator that is given access to all bands and modes available.
Regardless of the type of license that you are aiming for, spare time to study. There are plenty of resources online that you can avail of to prepare and ace your exam.
Related:
- 5 reasons why you need a ham radio license.
- How to get a ham radio license?
- How to renew a ham radio license?
Step 3: Build a complete, working circuit
To start, you have to familiarize yourself with circuit diagrams and understand how each one of the components works. At the same time, double check that you have the needed components. Use resources online for this.
Once you have adequate knowledge and are confident to proceed, you can start putting the circuit together yourself. Here, you can purchase a basic kit and work your way up to increasingly difficult ones.
If you are not a fan of pre-made kits, you can design, print, and manufacture your own circuit board using the Proteus program. Make the prototype first, then follow with your official one. This will give you space to make mistakes and learn from them. So, do not be afraid of experimenting.
Building ham radio from scratch by yourself is a trial-and-error experience. One thing is for sure: you are not going to get it right the first time. Thus, do not be discouraged if you have to pull parts apart and restart.
The fun is actually in the learning and building part itself! Be patient, meticulous, and committed. It is not easy to make a ham radio, but rest assured that it is rewarding.
Essential Tips on Building Your Own Ham Radio
- If you are new to working with radios, do not use kits that have surface mount features but go for ones with pre-mounted technology.
- When choosing a kit, make sure that you settle for ones with a cabinet and power supply. While some kits in the market do not have these, they’d still make you feel convenient.
- Make sure that, while soldering electrical elements or terminals onto the circuit, you are not interchanging them.
- Ensure proper grounding before handling any parts to avoid ruining sensitive components, such as the capacitors.
- Reassess what you have done before you bring any voltage into the picture. Otherwise, you will risk hurting sensitive components.
- Having a ham radio expert to guide and mentor is helpful. So, consider reaching out to the ham radio community and relevant forums for support. You will surely appreciate the insights, experience, advice, and assistance that others can provide.
Conclusion
There you have it! A detailed guide on how to build a ham radio from scratch. If you have managed to make your own ham radio using our article, please share your experience with us in the comments.
Also, let us know any other interesting insights during the building process to further refine and improve what we have here. We welcome inquiries and thoughts; therefore, do not be hesitant about leaving comments. Finally, don’t forget to share this article with your fellow ham radio friends, and revisit us for more valuable advice.

After four years working as a radio mechanic, I know that everything about radio communication is not breezy, even though it greatly benefits us. That is why I set up a website sharing my skills and guides to help non-professional users use their radio headsets, set up their antennas or choose the right products, etc.